Compare Geometry
The command creates an assembly to compare two or more components. It is designed to detect geometrical differences between different versions of the same part, sometimes difficult to identify visually.
The command can be activated with or without open model(s):
No parts loaded
Pressing the icon, Compare window will display
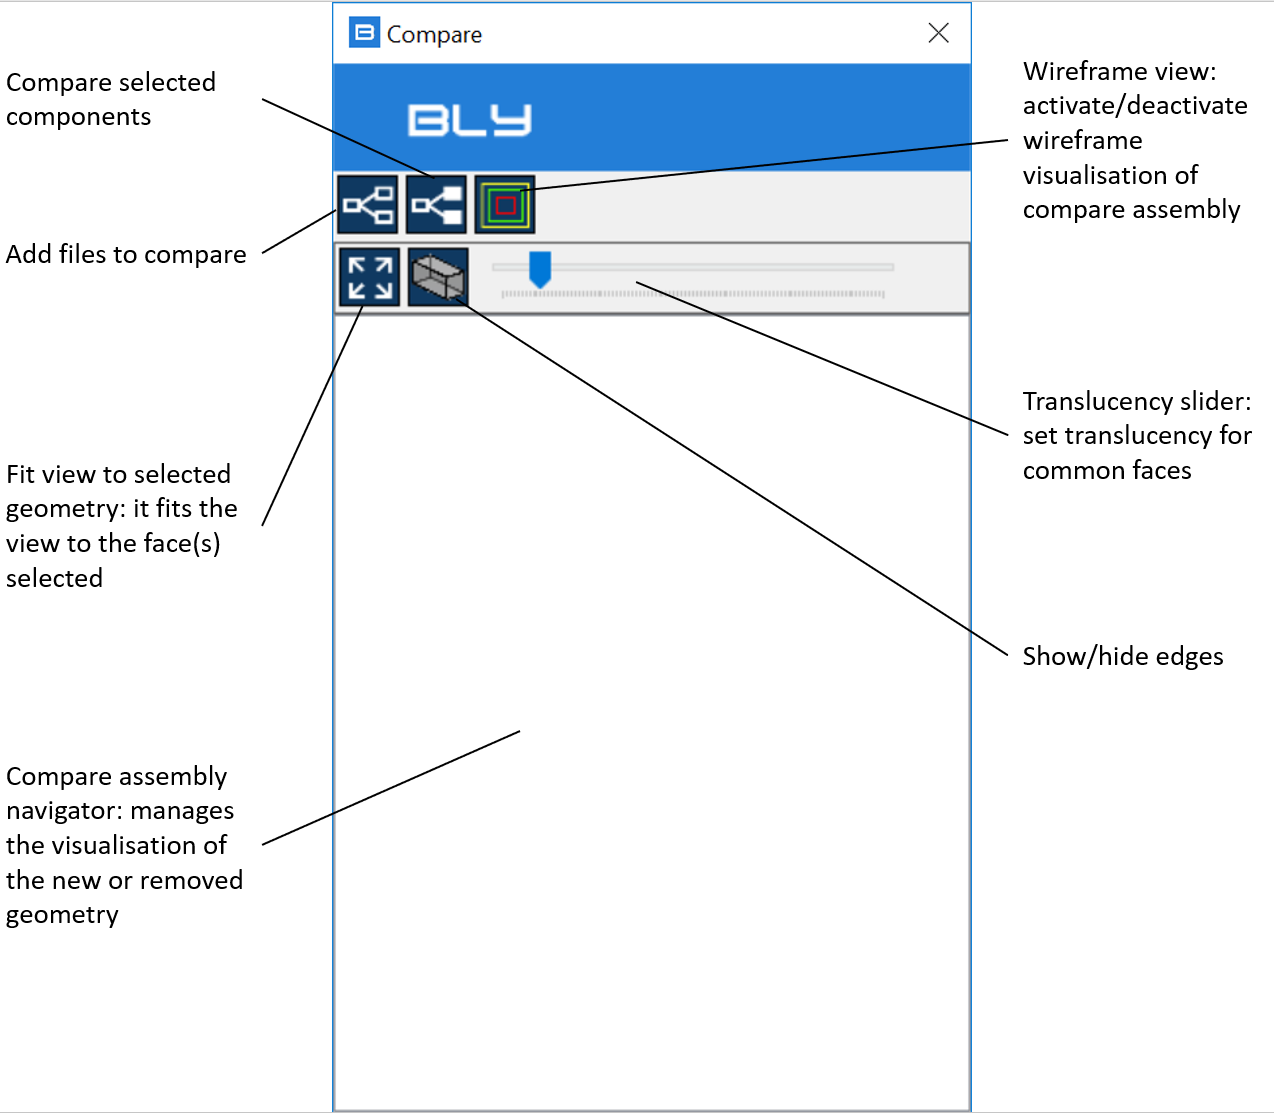
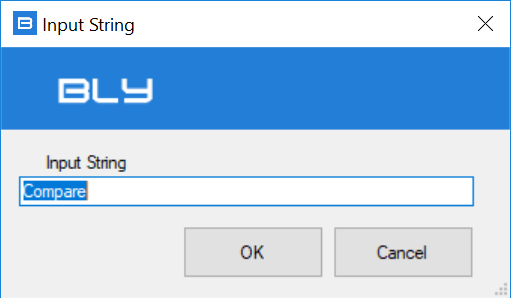
Pressing "Add files to compare", Guideline 4.0 will ask for the name of the compare assembly, which can be freely input be the user
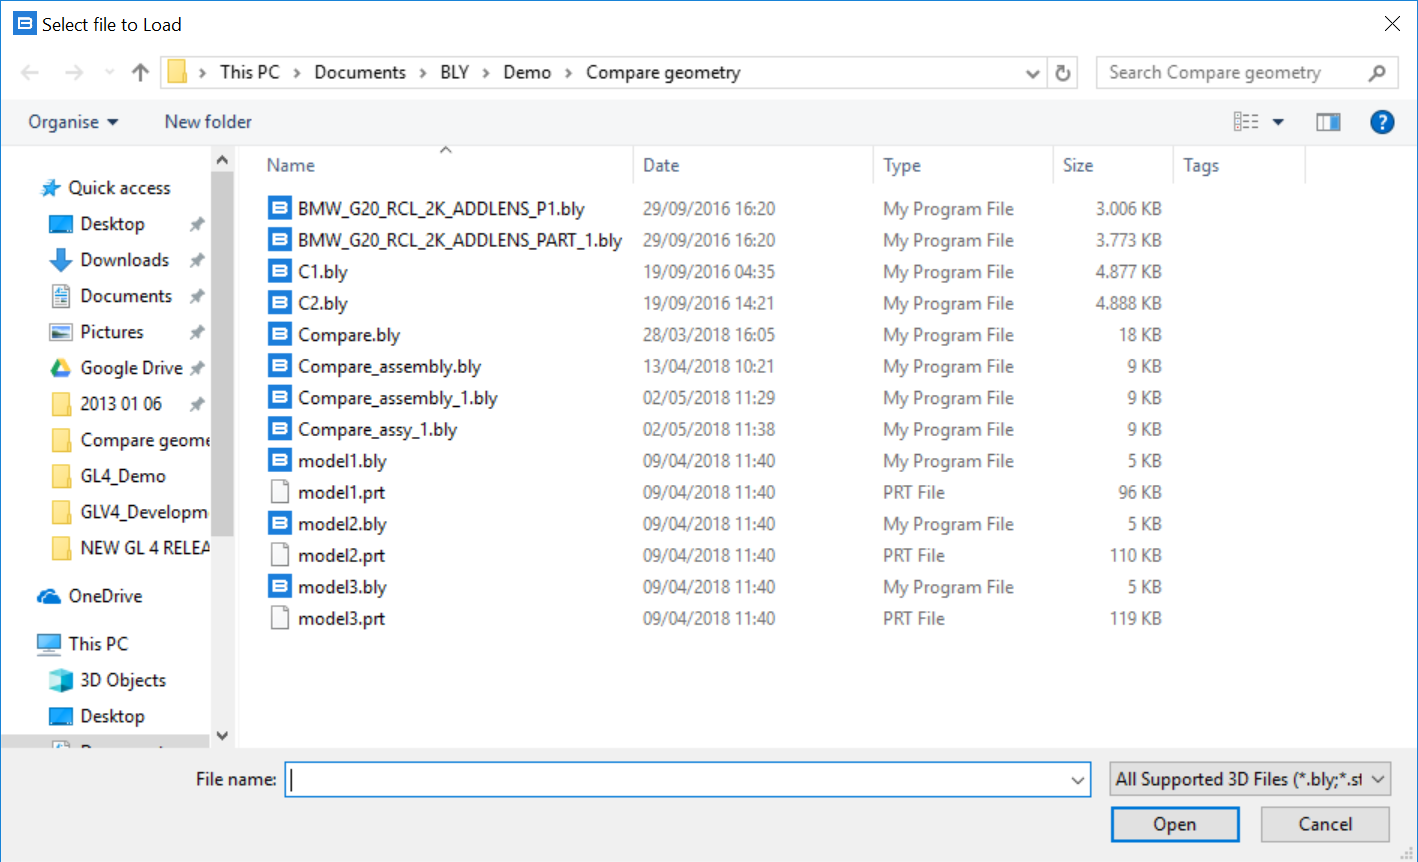
It will be then possible to select the first component from the file system, which can be any supported 3D model (.bly, .stp, .iges or, if Siemens NX is available on the PC, a .prt file)
The compare assembly starts to build
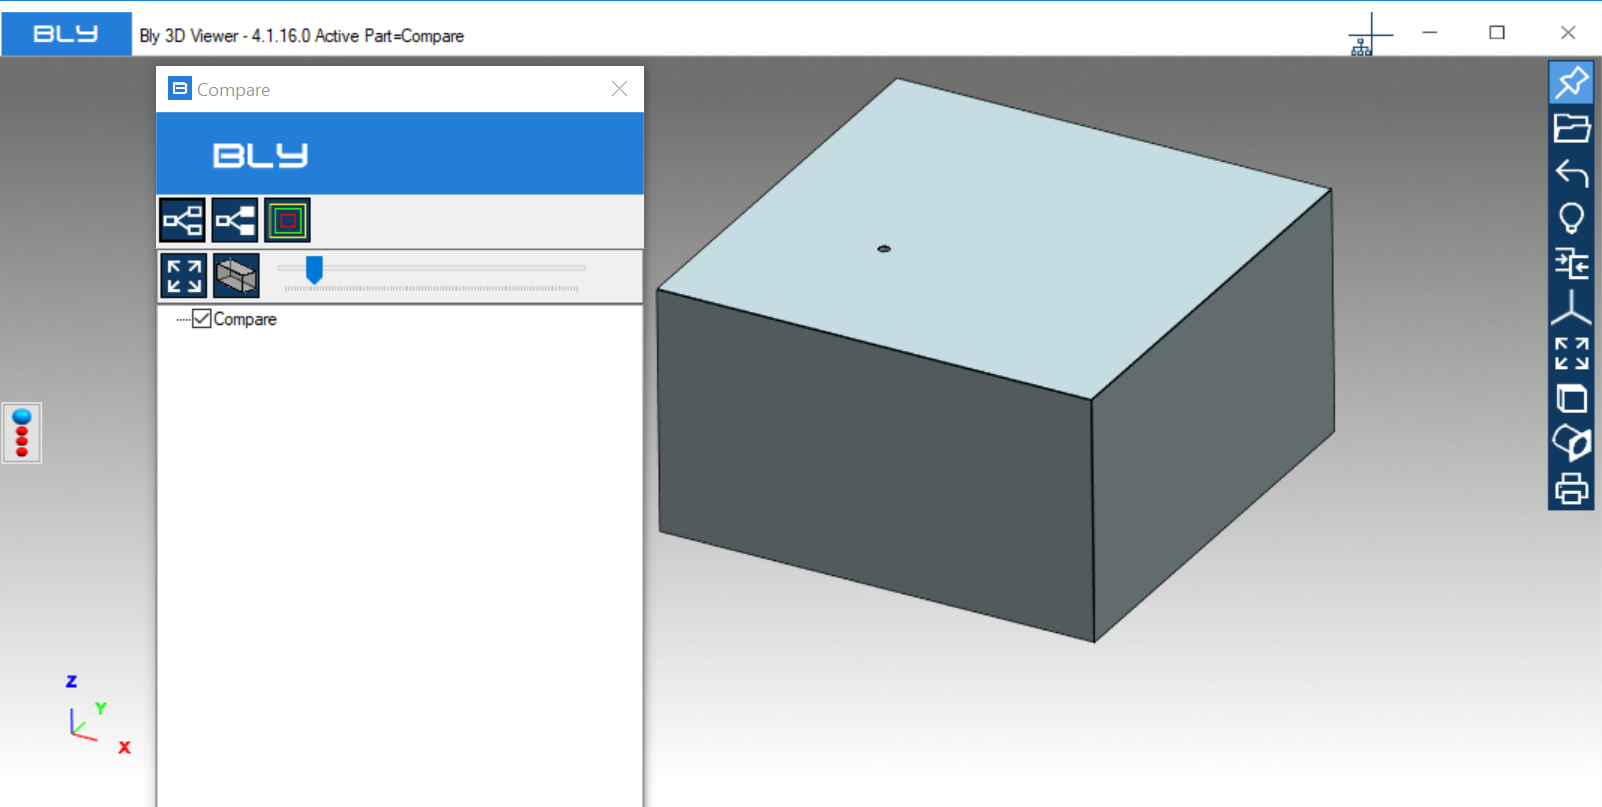
It is then possible to repeat the sequence as many time as the number of the components to be compared: after every addition, compare assembly will update
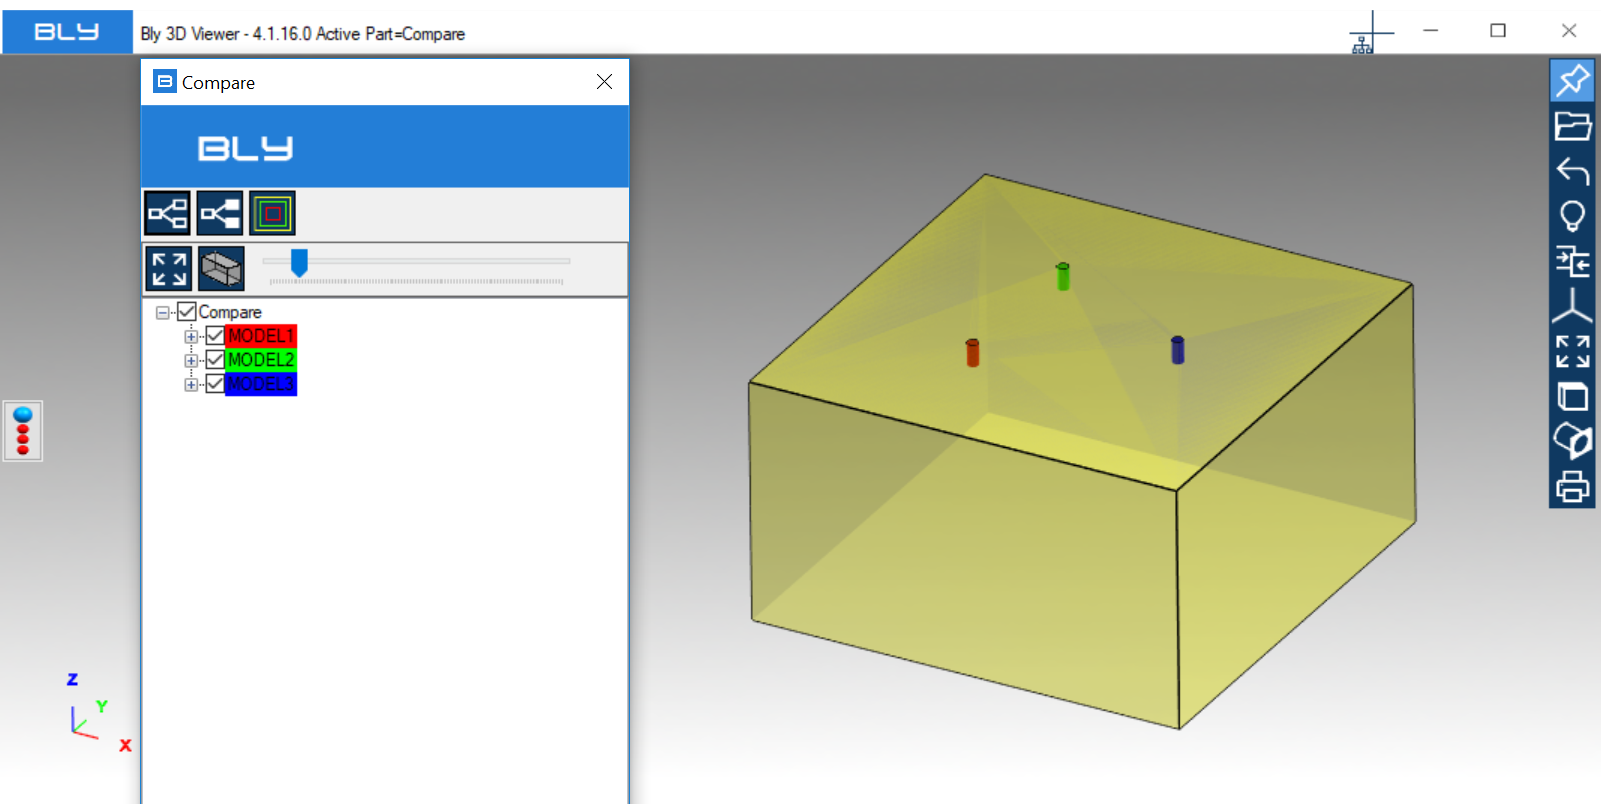
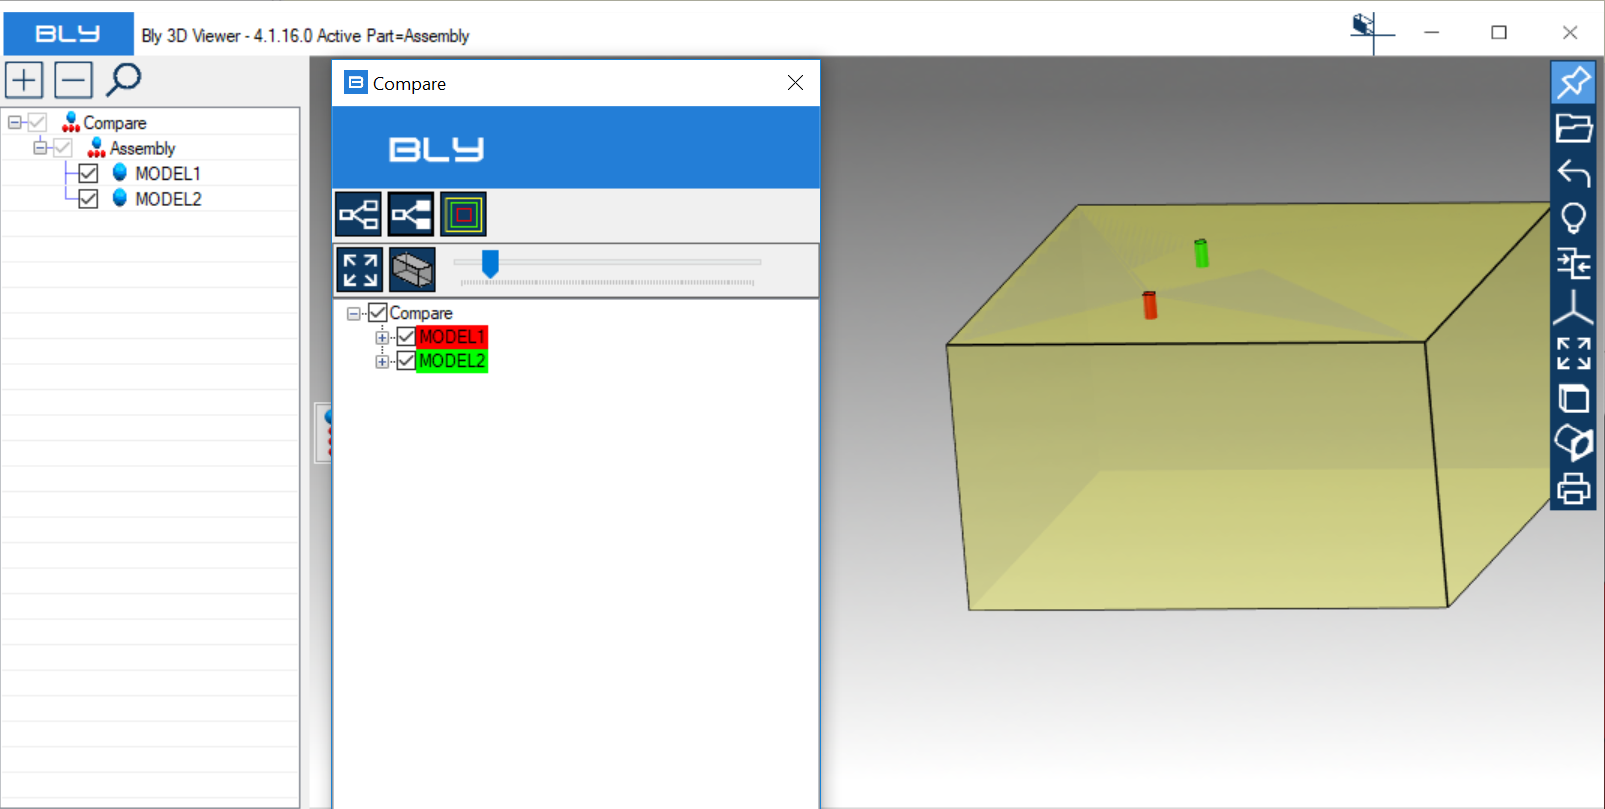
Transparency slider can show or hide the unchanged model, which may be useful to better understand the modifications.
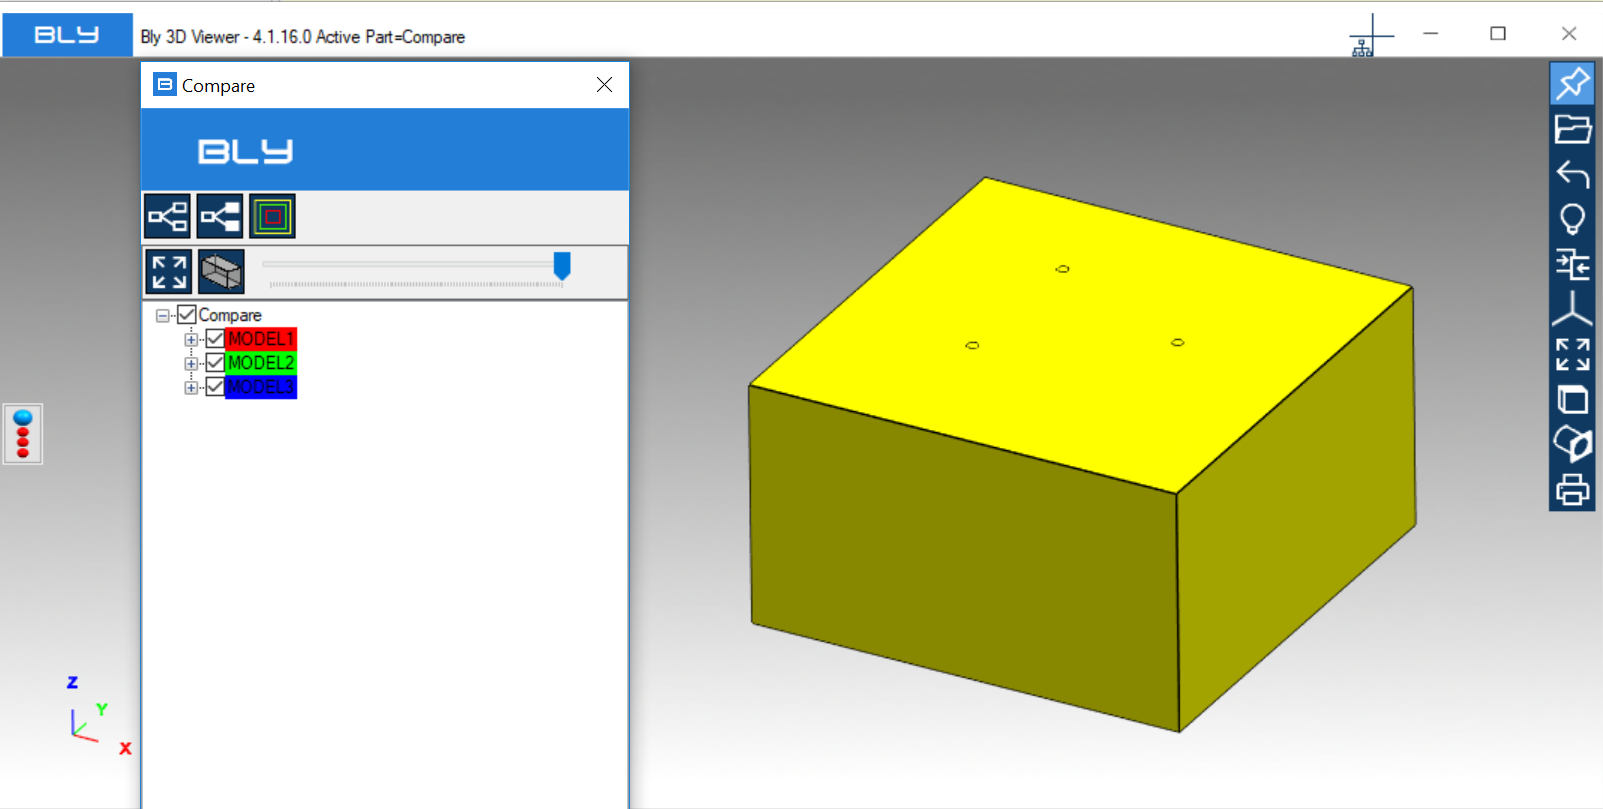
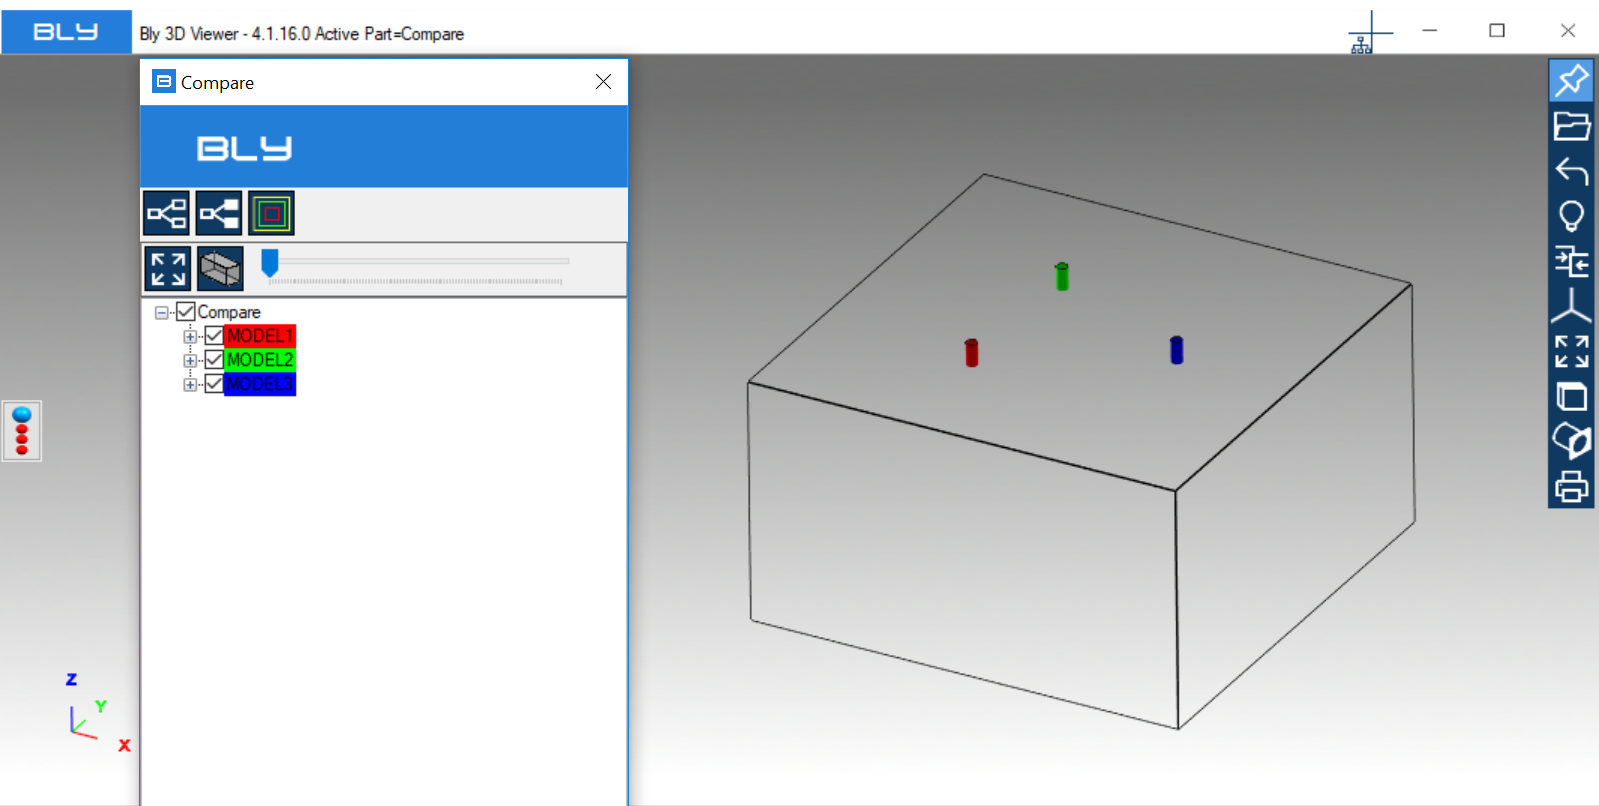
Component(s) can be turned off/on unthicking/thicking them on the Compare tree
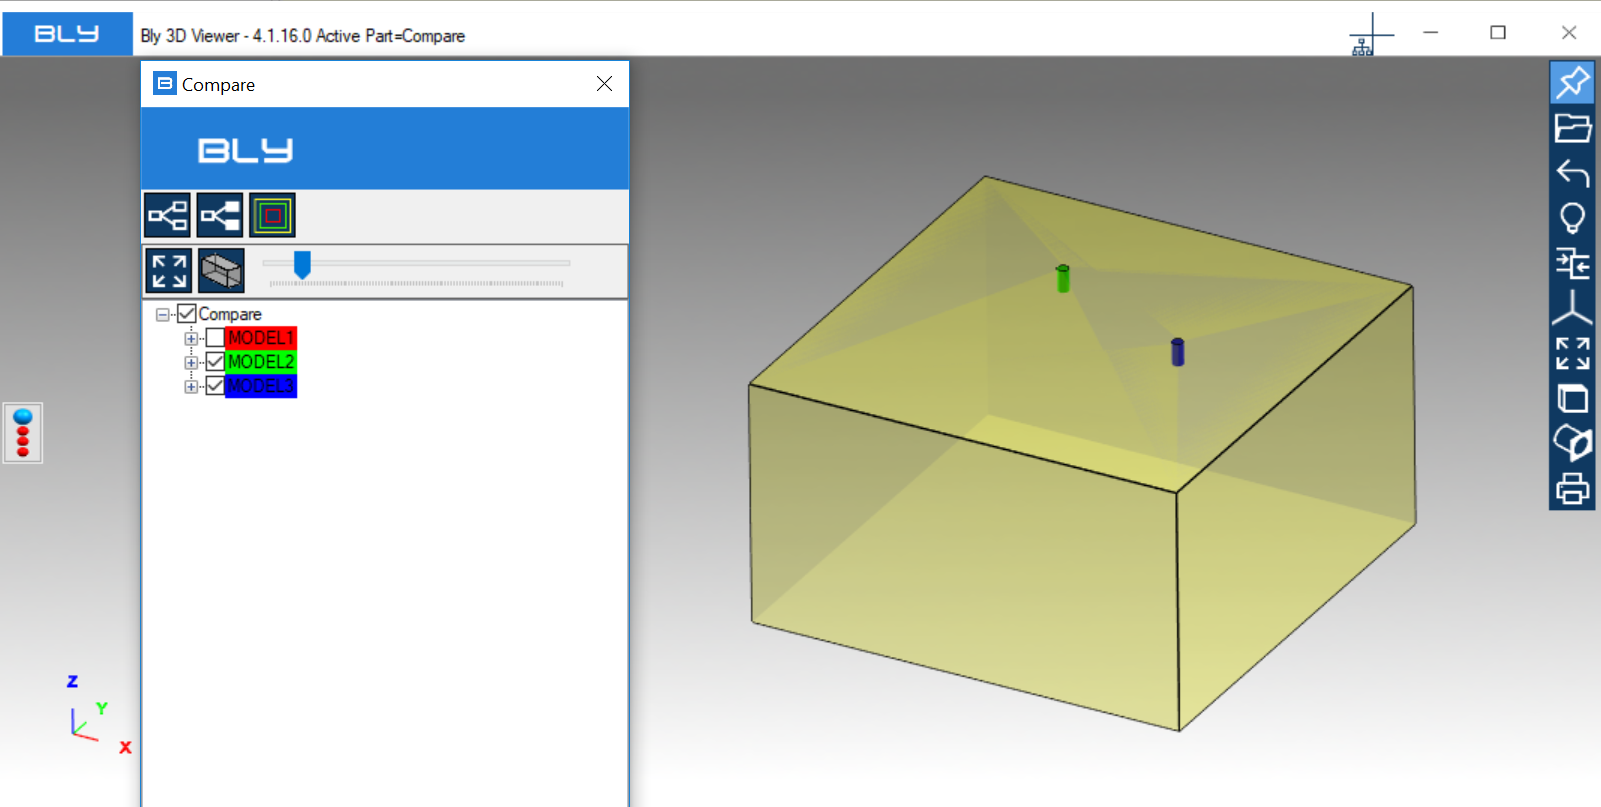
Right-click on the component from Compare tree will allow to Suppress/Unsuppress it: suppression makes a component inactive, but still present in the assembly
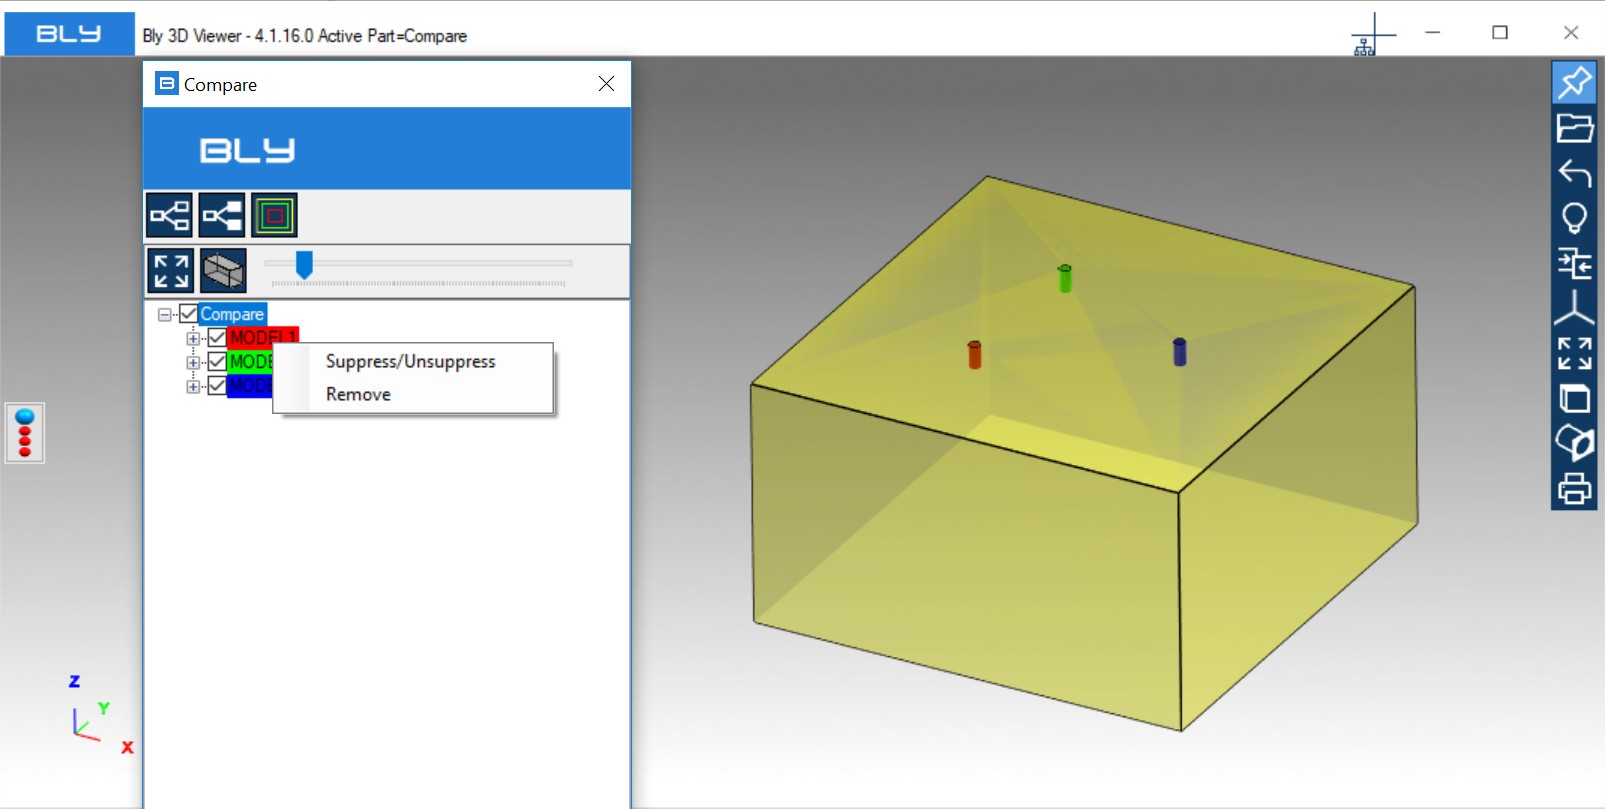
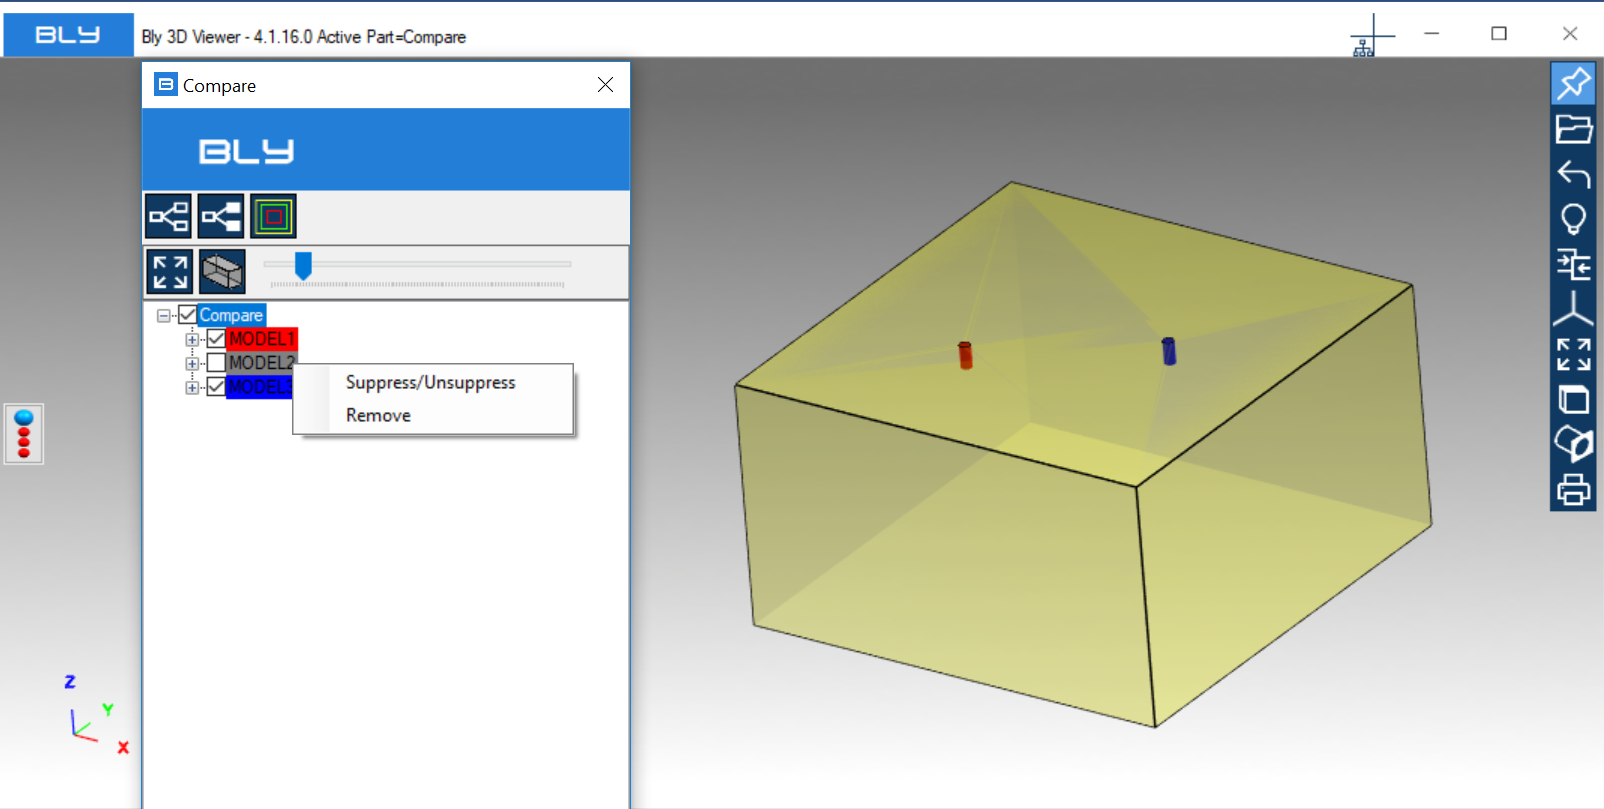
"Remove" will permanently remove the component from the assembly.
After exiting the Compare, the assembly will remain displayed and it will be possible to save it.
Parts/assemblies loaded
Compare Geometry is applicable to geometry open already:
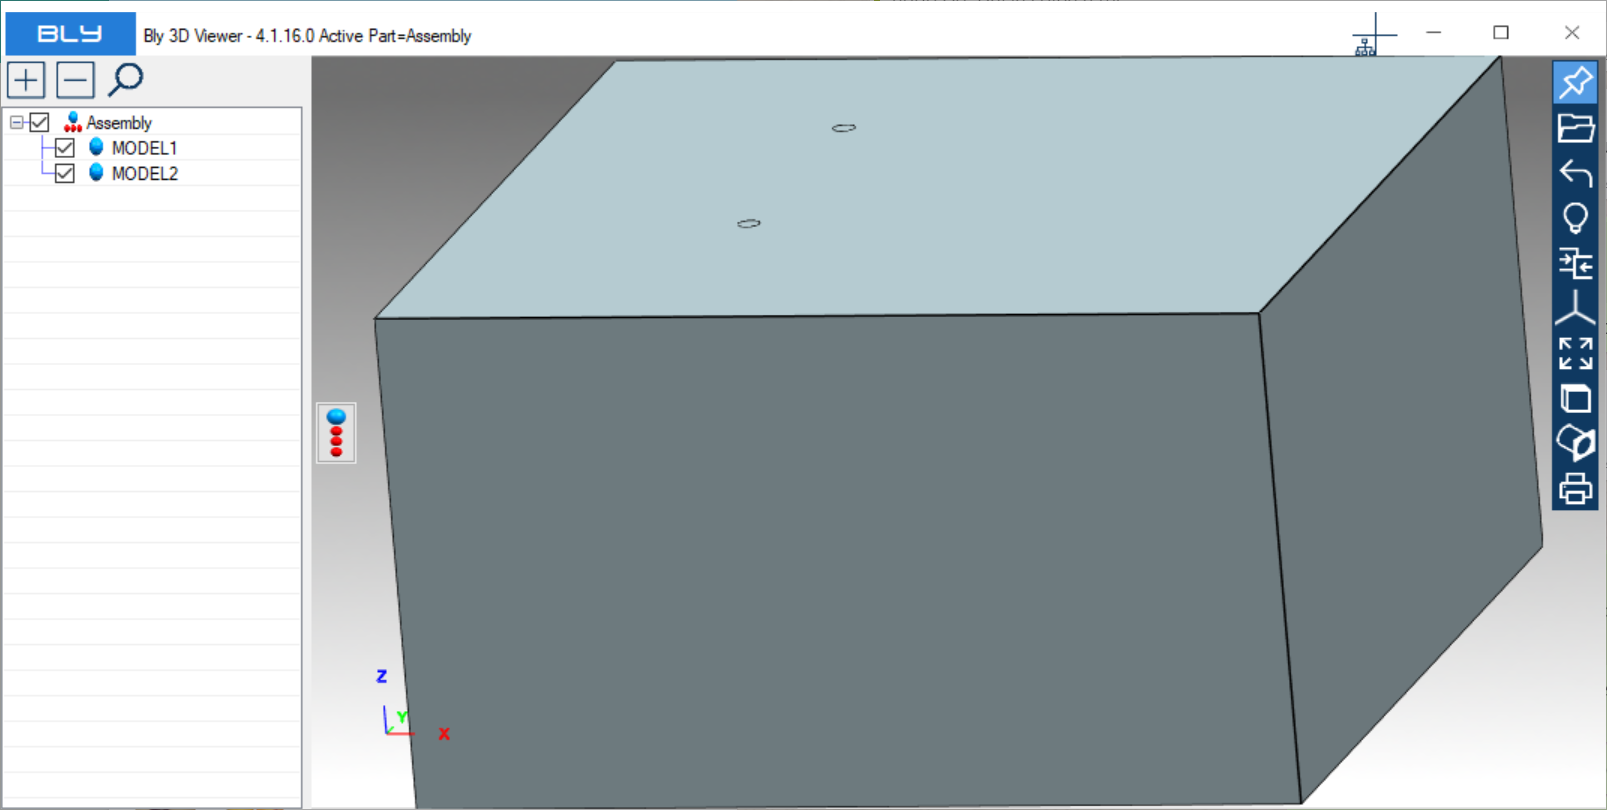
First, launch Compare Geometry and select the components to compare, either from graphical area or assembly tree
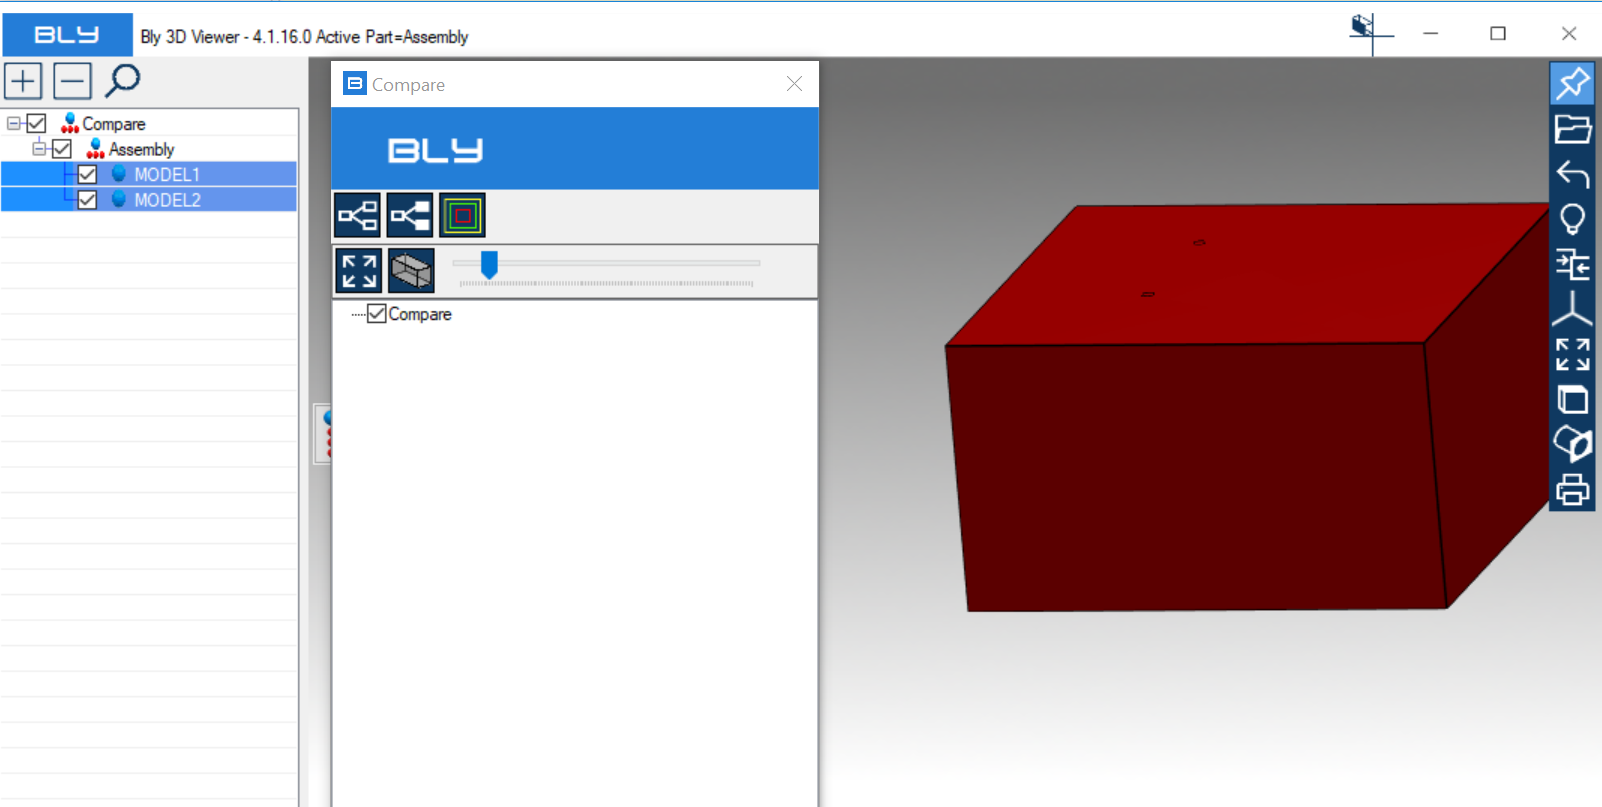
Then press Compare Selected Component to start comparison

Please, see also the related video
Created with the Personal Edition of HelpNDoc: Easy EBook and documentation generator